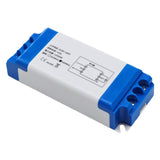
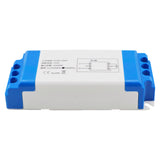
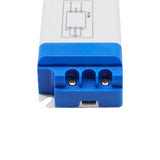
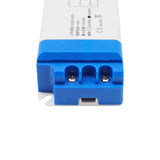
Package Include:
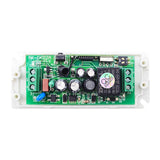
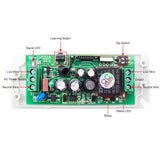
1 x Receiver: S1XC-AC
1 x User manual
Introduction:
This receiver S1XC-AC is an electric device with AC power output that can be used in one-transmitter-many-receivers system. For example, you can use a 1 button transmitter to control 1 receiver, or use a 2 buttons transmitter to control 2 receivers, or use a 4 buttons transmitter to control 4 receivers, or use a 6 buttons transmitter to control 6 receivers, or use an 8 buttons transmitter to control 8 receivers, or use a 12 buttons transmitter to control 12 receivers. The transmitter and receiver form a wireless remote-control system.This system may be used in all types of industry automation, agriculture, business, home, factory, house, farm, garage, vehicle, ship, aerial vehicle, etc. It can remote control different AC equipment on land, water, and air, such as lights, doors, windows, lamps, sockets, locks, sirens, outlets, heaters, motors, fans, electric solenoid valves, and security alarm systems. The applications are endless.
Key Features:
Wireless control, easy to install.
Universal Power Supply: AC 85V~250V.
AC Power Output: It can control AC equipment with a voltage range of 85~250V AC (Such as AC devices with 110V, 120V, 220V, or 240V).
3 Selectable Working Modes: Self-locking, Momentary, Interlocking.
Reliable Signal: RF signal can pass through walls, floors, doors, or windows, but it will lose some operating range.
Safety Features: Reverse voltage and overcurrent protection.
Interference: Two or more receivers may be used in the same area without interference.
You can use one transmitter to control multiple receivers, and each transmitter button controlling one receiver. For example, you can use a 1 button transmitter to control 1 receiver, or use a 2 buttons transmitter to control 2 receivers, or use a 4 buttons transmitter to control 4 receivers, or use a 6 buttons transmitter to control 6 receivers, or use an 8 buttons transmitter to control 8 receivers, or use a 12 buttons transmitter to control 12 receivers, etc.
Receiver S1XC-AC Parameters:
| Parameters | Detail |
|---|---|
| Operating Voltage | 85V~250V AC |
| Output Type | 85~250V AC (110V/120V/220V/240V), same as input voltage |
| Channel | 1 CH |
| Working Frequency | 433MHz |
| Maximum Load Current | 10A |
| Maximum Load Power | <2KW |
| Receiver Sensitivity | ≥-105dB |
| 3 Selectable Working Modes | Self-locking, Momentary, Interlocking |
| Suitable Wires for Connecting Terminals | 22-16 AWG |
| Operating Temperature | -40 °C ~ +80 °C |
| PCB size | 76 x 34 x 18 mm (3.0 x 1.3 x 0.7 inches) |
| Case size | 98 x 40 x 23 mm (3.9 x 1.6 x 0.9 inches) |
| Matching Transmitters | Can work with different transmitters, such as model C-1 / C-2 / C-4 (100M), CWB-1 / CWB-2 / CWB-4 (50M, waterproof), CP-1 / CP-2 / CP-4 / CP-6 / CP-8 / CV-2 / CV-4 / CV-6 / CV-8 / CV-12 (500M) and CB-1 / CB-2 / CB-4 / CB-6 / CB-8 / CB-12 (1000M) etc. |
Wiring:
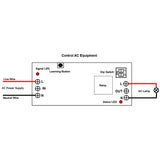
If you want to control an AC 120V lamp, do as following:
1) Connect the live wire of AC power supply to terminal <L> of IN, and connect the neutral wire of AC power supply to terminal <N> of IN.
2) Connect the live wire of AC lamp to terminal <L> of OUT, and connect the neutral wire of AC lamp to terminal <N> of OUT.
Setting different working modes:
The receiver will be set in Momentary mode before leaving the factory, if you want to use another mode, please follow the following steps.
1) Setting Self-locking mode: Turn on the first bit of the dip switch.
Operation with C-1:
Press button → The output terminals outputs AC power (lamp ON)
Press again → The output terminals stops outputting (lamp OFF)
2) Setting Momentary mode: Turn off the first bit and the second bit of the dip switch.
Operation with C-1:
Hold button → The output terminals outputs AC power (lamp ON)
Release → The output terminals stops outputting (lamp OFF)
3) Setting Interlocking mode: Turn on the second bit and turn off the first bit of the dip switch.
Operation with C-2:
Press Button A → The output terminals outputs AC power (lamp ON)
Press Button B → The output terminals stops outputting (lamp OFF)


